How to Install Weathertech Car Mats? [Step by Step Process]
Looking to improve your car’s interior? Wanting to give it a fresh look and feel? One of the best ways to do this is to install Weathertech floor mats. They’re custom-fit, long-lasting, and easy on the eyes.
But if you don’t know how to install these things, in this article, we’ll go over what you need for installation, step-by-step instructions on how to install them yourself at home safely, and correctly (it takes about 5 minutes).
Top Rated Weathertech Car Mats


Step by Step Procedure to Install Weathertech Car Mats
Here is a 10 Step Guide on how to Install Weathertech Floor Mats in Your Car.
Required Items

Step 1- Remove all Other Floor Mats from the Vehicle
To begin, take all the other floor mats out of your car. You don’t need any other mats while using the Weathertech Floor Mats. You shouldn’t put anything beneath Weathertech floor mats for 2 reasons
- This will lead to the inappropriate fitting of the floor mat in your car.
- Wrongly fitted floor mats may obstruct the use of Clutch, Brake, and accelerator Pedals which may lead to dangerous driving situations.
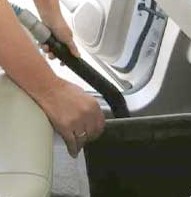
Step 2- In-depth Cleaning of Your Car Floor
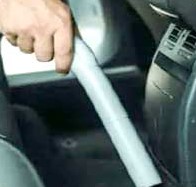
To prepare your car for Weathertech Floor Mats, use a vacuum cleaner to clean the floor and remove any loose dirt or debris.
The Vacuum Cleaner will remove any dust that may be hiding in places like between seats, under carpeted areas, etc.
Next, you’ll need to clean the car’s floor using a floor cleaning product. This ensures that there will be no tough stain or any other fluid left on the floor which could damage the mats over time.
Once properly cleaned, dry off excess moisture with paper towels or cloths before moving forward in the installation process of Weathertech Floor mats.
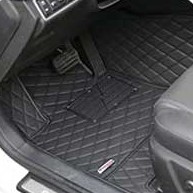
Step 3- Select the Correct Weathertech Floor Mat
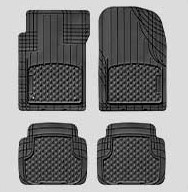
Weathertech Floor mats come in a variety of forms and sizes. It’s important to select the correct mat for your car with respect to its make, model, and year.
To ensure that you buy the right size Weathertech Floor Mats, it is highly recommended that you measure the length, width, and depth of the area where they will be installed.
Step 4- Identify the Correct Floor Mat for the appropriate Floor location
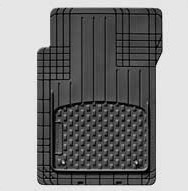
It is essential to select the correct WeatherTech Floor Mat for the appropriate floor location of your car. Because these mats will only fit the correct side of the Car.
It is easy to find out the correct Left-Hand side and Right-Hand side mat, look for the location marking on the underside of the mat and it is molded next to the part number.
You can also match the shape of floor mats to the contours of the vehicle floor.
Step 5- Check the Retention Devices
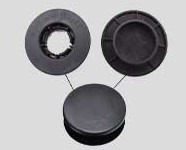
Take note of any existing retention device in your vehicle. If your vehicle has a factory retention system by all means you should be using it.
Your new floor mats may be secured with either the existing retention system or a combination of the existing retention device and a weathertech supplied supplemental device.
Retention hook bosses and holes are located at the bottom of Floor Mats near your seat rails. You can use them to secure the mats to the floor.
Use only factory-supplied retention hooks to secure the mats to the floor. Also, use the supplied retention grommets and anchors for fixing the hooks.
Weathertech Car Floor Mats fit and work perfectly for all kinds of retention devices like
- Retention Device with Bayonet Bottom(Like BMW)
- Tech Grip II (Chevy)
- Twist Retention device( As Honda and Toyota)
- Post Retention Device(Chevy, Audi, Porsche, VW, Ford)
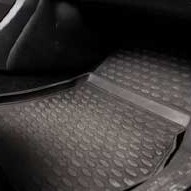
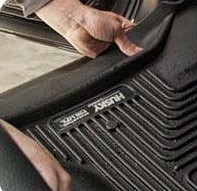
Step 6- Install Floor Mat on the Driver’s Side
Install the Left Hand Side (LHS) marked floor mat on the driver’s side of the car. Make sure that the gas pedal and brake pedal come down on the top or upper side of the floor mats. So always put the mats underneath the pedals.
Once you slide the mats under the pedal, center the Retention snap caps on top of the retention posts. Now press the retention caps to hear a positive snap on both sides.
You can also secure the mats with supplement retention devices from weathertech. Check the instruction manual if your floor mats need supplemental retention devices.
Remember Not all vehicles use retention devices.
Step 7- Inspect Vehicle Control Pedals
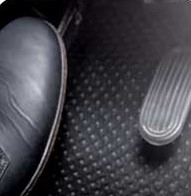
Check the gas, clutch, and brake pedal for full movement and no interference whatsoever due to the installation of mats.
Step 8- Installing the Passenger Side Floor Mat
Installing the passenger side of floor mats is a bit different. To install the mat, slide it under the gas and brake pedal first as before but use loops to secure them with hooks on your car’s floor. You may also attach retention snap caps to posts or clips in your vehicle’s carpets if there are any.
Step 9- Installing the Rear Floor Mat
Installing the rear floor mat is a bit different.
To install the mat, you will need to lift up your vehicle’s back seat and fold it down. Then repeat Steps 1 and 2 before installing the rear or 2nd-row floor mats in your vehicle. Slide it down the front row seats and lay it in.
Step 10- Frequently Check the fit of the Floor Mats
Check the fit of the Floor mats frequently, especially after every wash, service, or reinstallation. Ensure you clean the installed weathertech mats regularly for longer life.
When you get your car serviced or take it to a car wash sometimes they take the floor mat out. But they might not put them back correctly or snap properly. So every time you get your vehicle from a service or car wash visually inspect the vehicle.
Checklist to Install Weathertech Floor Mats for Cars
Before Installation
- Remove any existing floor mats before installing Weathertech Floor Mats.
- Do not stack floor mats on top of one another
- Use only the Correct Floor Mats according to the Make, Model, and Year of Vehicle.
During Installation
- Install directly on the floor of the vehicle and not over other floor mats.
- Do not mix up the sides. Install the left-hand side (LHS) on the driver’s side floor area. Install the right-hand side (RHS) on the passenger’s side floor area.
- Ensure Weathertech Floor Mats must fit the contours of the vehicle floor.
- Install the Weathertech Floor Mats right side up, not upside down.
- Use the provided retention hook and devices to fit the floor mats properly and securely.
After Installation
- Always check the accelerator (gas), brake, and clutch pedal for full movement after installation.
- Check for any interference with any of the pedals after installing the floor mats.
- In addition to the regular safety checks, make sure there is nothing in your car that could become lodged and hinder you from accelerating or stopping.
- Always do a frequent check especially after the vehicle is serviced or washed.
- Don’t use Weathertechher Floor Mats in stunts or racing cars.
- You should not drive barefoot.
Hope you like our Guide on Weathertech Floor mats and have a successful installation.
If you are looking for good Weathertech floor mats for car, check the below options: